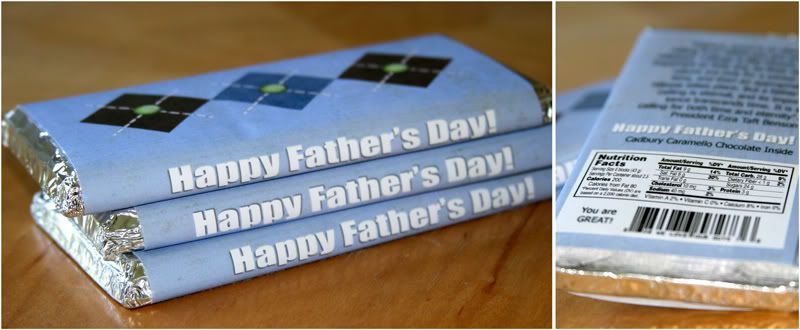
1) Scan in a candy bar wrapper at 300 dpi. Scanning in and printing at 300 dpi is the key to getting your custom wrapper the right size. Pull that scanned image into Photoshop (or any other image-editing program) and create your own design on new layers on top of the scan.
2) There are tons of ways to create your image to fit the candy bar. I personally like to create a new layer, then use the marquee tool to select around the outside of the candy bar. I fill that space with any color.
3) Reduce the opacity of the new layer so you can see below it. This makes it easy to make sure you design the front, sides and back in the exact right spots.
4) Take your marquee tool and select the area where one side of the candy bar will be. Right click and choose "layer via cut". This will cut that area into a new layer. Recolor that area so that it's easy to see. Follow this step for all the other sides of the candy bar. Remember you have to be on the layer you want to cut from when you choose "layer via cut". If you are on the wrong layer it won't work.
5) There are many ways to create this candy wrapper but here are two of my favorite ways:
- Option A: Increase the opacity of each of the layers back to 100%, and then use the layers as a template and "clip" your papers, pictures and embellishments to it. Have you tried this before? If not, read this tutorial.
- Option B: Cut the background you want to use to the size of the candy bar wrapper on your bottom layer. Then design the rest of your wrapper on top of that layer but UNDER the rest of the layers you created in step 4. When you are all finished creating, delete all the top layers you created in step 4.
6) Print, cut and wrap your candy bar. If you print at home (or at most photo labs) the size should be perfect. I printed mine at an office supply place. It shrunk the size down a little. The size has to be perfect for this to work, so you may have to adjust the size a bit until it works. Bring your original candy bar wrapper to the printer to make sure it prints right.
More tips:
*Do you see how I added the nutrition information and the barcode to my new wrapper? It was easy. I just turned them into brushes. Learn how here.
*You can delete the numbers off the bar code and write a message where the numbers were.
*Add a personal message or a quote to the back.

Father's Day Tile
I got the design idea for the candy bar wrapper from Brooke Kemp. She created this cute tile for a Digital Scrapbook Weekend Retreat I held in Park City this past April. It's REALLY easy to put your pictures or scrapbook layouts on tiles. Go somewhere like Lowes or Home Depot and buy tiles that are smooth. Any size is fine. Create your design on a canvas the same size as the tile, then print and cut it out. Apply a thin layer of Modge Podge on the tile and then put your print on top. It will only take a few minutes for this to dry, then you can apply a thin layer of Modge Podge on top of your print and the tile for a nice look. I love these tiles. Thanks for your help with that class Brooke!
0 comments:
Post a Comment